Free background from VintageMadeForYou

Friday, 7 March 2014

Better late than never.


Hello Blogland, I hope you are all well! Well I don't know why I bother making New Year resolutions, I always break them. I apologise for being a bad blogger, but as the title says, "Better late than never". Recovery from an operation and  ill heath keep getting in the way. I hinted with in my last post that I was thinking about designing my own digi's, well I have. I have designed them to be multi purpose and appeal to every crafter, weather you are a Tangler or into mixed media, I hope they will ignite some inspiration.

To help launch my first range and to spread the word, I'm looking for people to join the design team. The details of how to apply will be at the end of the post.

So to get your creative juices flowing, here are some inspiration created by two of the design team and also by a couple of my friends. So here we go!

 My Very good friend Erin, has a Boston terrier called scooter and asked if I could custom my dog digi for her, so that the dogs ears were pointed at the top, to look like Scooter. I was glad to. Erin is in many of swaps with various groups on social media sites, I don't know how Erin has the time, I must ask for lessons, but I digress. Erin had to create and ATC for one of the swaps and decided to make a kinetic ATC, using the customised digi. Erin coloured the digi with Copics and designed the kinetic parts to make digi Scooter jump when the tab is pulled. I love this idea and also the colours that Erin used. To see more of Erin's creations click here.

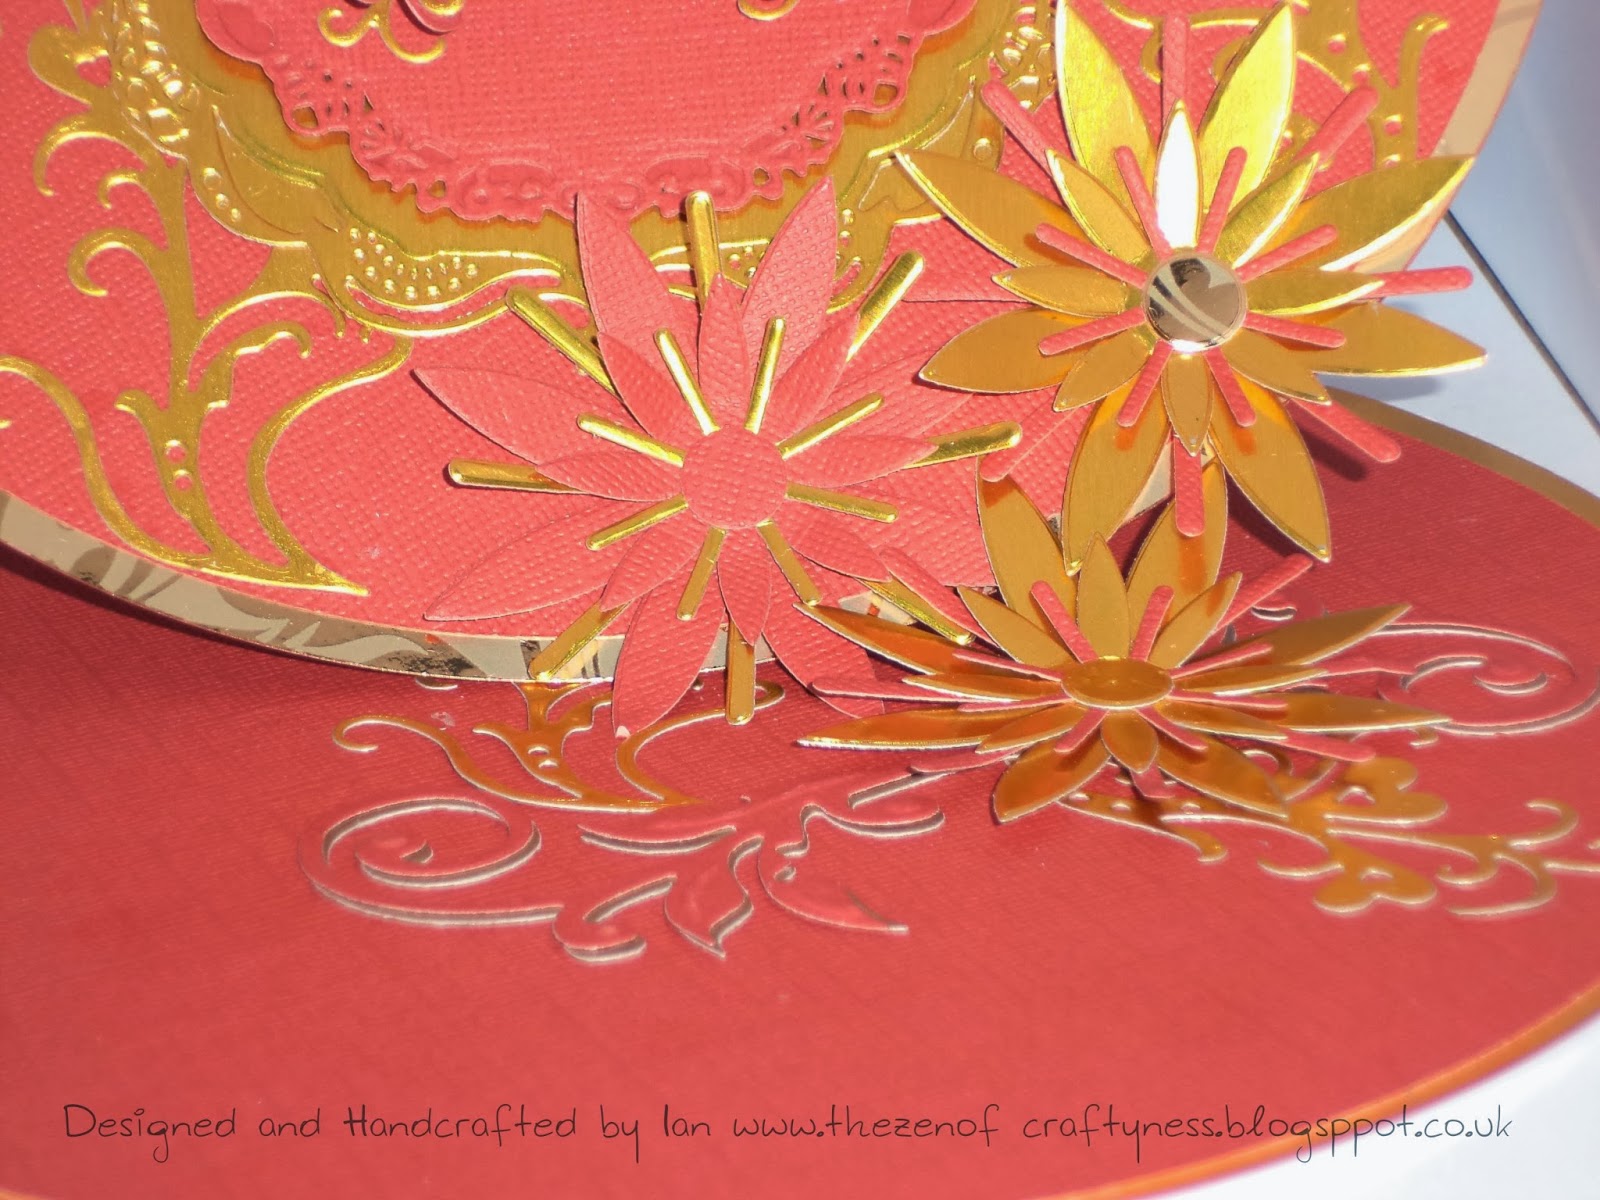
The next two creations are by a mother and daughter team. Tina and Megan Cox. Yes you're right, it is Tina Cox from the telly. You might not know that Tina, as well has being a parchment guru, Tina is also a whiz with a micron pen. I sent Tina a couple of the early versions of the digis and asked her to to tangle away. I was simply blown away when I got the samples back. I wish I could tangle, I've tried but, it looks like doodles, but not constructed doodles. I won't keep you waiting any longer. Here are Tina and Megan's creations. Tina's Sample is the digi with the hat and Megan injected the digi with colour. Speechless simply speechless.


Now for my Design teams marvellous creations. In no particular order, I've always wanted to say that, Diane. Diane's creations show how the digi's can be used traditionally for card making, but that doesn't do justice to her work at all. The colours of the backgrounds and how the images are coloured, make the images pop. I am so happy with the way Diane as interpreted the images and so honoured to have Diane on the design team. Here we go, three creations from the marvellous Diane. You can see more of her work on Facebook.


What can I say about Christine, to do justice to her work. Well it is all excellent. Christine is a multi skilled crafter with fingers in many of a crafty pie. Christine's blog is simply inspirational, with creations from paper craft to fabric craft. Again I'm at a loss where Christine finds the time, but I am glad she has. Christine's sample is a genre that I have just dipped my toe into, grunge. Christine's creation shows again another way to use the digi stamps. Christine's choice of colours and her tangle work, turn the image into a grunge master piece and I just hope I can master the messy world of grunge as well as Christine had. Shall we have a look see at Christine''s creation. Oh go on then, here we go!! You can see more of Christine's superb creations here


So that just leave me and my creations. After showing the design teams creations, mine are pale in comparison, but I did try. I wanted to show how the images can be used for digital and hybrid crafting, by using the same composition. All my designs can be taken into digital crafting programs, like Serif and My Craft Studio, so they can be edited to suit your own crafty needs. I used one of Daisy Trails Steam Punk Digi kits to create both versions of the Bon Voyage card. The first one was designed totally in Craft Artist and printed out folded and presto, a card finished, ideal for when you are in need of a quick card. On the flip side the Hybrid card I used Craft artist to print out the elements of the first card out, several time and also printed out a backing paper again from the same digi kit. I was gifted a 72 Spectrum Noir marker set from my dad, as a get well soon gift, when I came home after a over night stay in hospital, and I love them and want to master them, off on a tangent again sorry. I printed and cut out the elements. I used the pens to colour my digi images. I used iced and brown greys, true blues, pale pinks and for the heart I used the darkest bright pink. I decoupaged the banner and the outside columns of the Tajish Mahal and used Collal glue gel to raise them. For the dogs lead to match the metallic lead of the first card, I used, wait for it, a gold plated chain. There we go, two cards using the same composition, using the same images.

I am trying to figure out out to convert the images into Silhouette cutting files, so they can be easily cut out, but I'm not having much look at the moment, but I will keep trying.

DT Call out.

So if you were inspired by the samples and would like to join the design team and work with these images and the images to come and like thinking outside the box, please send an email to: me . Please include the following:

1. Name:
2. Email:
3. Blog or website address:
4. Links to any on-line galleries you may have:
5. Three items, cards, or layouts{one to be using a digital image}Your entries don't have to be new, but must be your crafting style.
6. Details of any current or past design teams you are or have been involved with
7. Please tell us a brief intro about what yourself, what you like about crafting and what you find exciting about crafting. 

General Requirements

• You will need to be able to commit to posting two projects a month using the images and back linking to my blog
• To be able to post and join in with the monthly Challenge blog.
• To be able to comment on the entries of the Challenge blog
You'll also need to be ready to have some FUN and enjoy your Craft's!!!

Having a active Facebook account would be good, but not necessary, because they will be a Design team Facebook group. 

Closing date for entries is Saturday 12 April 2014


I look forward to receiving your entries. Good look folks. 

Ian xx

Monday, 20 January 2014

All Rise for Ella Bella The Grunge Princess.

Happy New Year Blogg Land. I hope you all had a good Christmas New Year.I don't usually make resolutions, because I always break them in the first few day. But this year I have made three and I will keep to them, because they all revolve round my passion, Craft. They are to try a different style of craft, design my own range of Digi Stamps and blogg more. So tick, tick, tick. So far, so good. This card is the different style of crafting. I have always loved Hels Sheridan's style of crafting, and I wanted to give it a go, which I did, but with no success. Well that was before I got some expert advice and things started to fall into place. So I decided to make a background for a card using the new technique, Grunge!

I had an idea for a card using two of my favourite IndigoBlu stamps, Ella Bella and Floral Swirl. You can find these stamps and all of the amazing IndigoBlu range here. I wanted to incorporate my new love of Grunge, but it had to be pretty, because the stamp warranted it. I tried the wrinkle free technique, all full tutorial to come this week so watch this space, but all the results were too grungy. so I decided to do the direct ink technique, again tutorial to come. I laid four colours of Tim Holtz Distress Inks on white card a little at a time. the colours I used were Worn lipstick, Seedless Preserves, Mustard Seed and Barn Door. The good thing about this technique is that id I has done another background it would be completely different. I used cut and dry foam to lay the ink down, until I was happy with it. I then stamped the Floral Swirl stamp with Seedless Preserves, in the top left and bottom right corners to leave a very subtle faint impression. I them stamp Ella Bella as the focal image in Walnut Stain, directly onto the background. I then went round the edges with Walnut Stain to age it. I didn't have any brown card to mount lay it on so I used a piece of white card and inked the edges with Walnut Stain. I used the Walnut stain edged card to mat onto gold mirror card and laid the grunge topper onto both and them glued it onto a 5.5 by 5.5 inch card blank.

I looked at the card and wondered what I could embellish it with, after a lot of humming and arring I decided that all it need was some small Aurora Borealis gems. I placed three of the gems at the top left and bottom right of the card. There we have it my take on pretty grunge. I hope you like it.

Ian xx

I have entered my card into the IndigoBlu Challenge Blogg. You can find the challenge here

Wednesday, 16 October 2013

Oriental, but not Oriental!

Well hello my blogland friends. It has been a while since my last blog. I have had a couple months of crafters block, but I am back. I decided to make a different shape from the norm, so I went for a circle. so here goes.

I used the Xcut Circle cutter to cut out three 8 inch circles. I scored one of the circle at 4 inches and 1 inch. I folded the card in half at the 4 inch score and folded the 1 inch score and used the flap to attach the two circles of card together. I the glued the third circle of card to the folded card circle to form an easel card. I then matted the base and the top of the easel card with gold Mirri card and then layered that with red core-dination card stock. Now on to my favorite part of card making, the embellishment. I received a Tattered Lace butterfly die for my Birthday a week ago and I decided to use it on this card. The die cuts like a dream, there is no need for wax paper at all


I used the largest and second largest Spellbinders Gold Labels four to make the mat and layer for the butterfly. I cut the largest  die cut in gold and the second largest in red core-dination's card. I cut out the Tattered Lace Butterfly out twice, again one in gold and one in red. I clued the red butterfly onto the gold butterfly, just the body, so the wings were left free. I then attached the butterfly to the gold labels four die cuts. I then cut out 5 Sizzix star flowers again in gold and red and I also cut the Tattered Lace flourishes that came with the butterfly die several times. I placed the flourishes at either side of the top of the easel card. I placed two of the star flowers at the top of the card and two at the bottom of the card so it looked like the flourishes were coming from the flowers.

Now onto making the stopper. I didn't want to go down the normal route of using a narrow matted and layered strip of card, so I was thinking about what I could use. After a few cups of tea and a couple of biscuits, oh well nearly a packet, the light bulb turned on, why not try using one of the Sizzix Star Flowers. I didn't want to just plonk the flower on the base, so I decided to had a little bit of a flourish, so I cut two Joy Flourishes again in, guess what two colours, yep you got it, red and gold. I attached the red flourish on top of the cold flourish, so it looked liked the red flourish has a gold shadow. I cut two Tattered Lace flourishes again in gold. I attached the Joy flourish east to west and the two Tattered Lace flourishes north to south on the base of the easel card.

Then I was hit with a little bit a genius, but unfortunately it only lasted until the card was finished, I had the idea of, if I placed the flower that was going to be the stopper, in the right place, it would make a trio of star flowers. I tried it without sticking the flower stopper down to see if it would look OK and work. The flower did the trick and as a bonus it looked good as well, so I stuck the flower in place

So there we have it, my red and gold delight. I hope you enjoy my project.


Ian.


Sunday, 9 June 2013

Deeper under the sea.

Happy Sunday blogland. I hope the sun is out and you are having a good day.

I've have been trying out different card shapes, from the usual side, tent fold and easel cards that I usually create. This is my first attempt and I don't think it turned out too bad. I also used my favourite stamp at the moment, the cute mermaid Stamp from La La Land. Let's get to the make......


I wanted to try a variation of a gate fold card. For my card blank I used 2 6x6 scalloped edged cards. I folded the front of both cards in half, so the card front met the central fold. I then glued the two cards together using Cosmic Shimmer glue. I then stamped the image onto bleedproof card. I decided to challenge myself to using different colours of ProMarkers, than I usually use. For her skin I used almond, pale pink and Soft peach ProMarkers. For her hair I used blue grey 1, glacier blue and soft aqua flex marker. The next set of colour, I will be really honest with you, I have never used, just because I didn't think the lightest colour would blend into the other ones. I was happily surprised. For her tail I used holly, forest green and lime green. For her top, I used amethyst and cerise. When all the image was coloured, I fussy cut the image out. To decorate the inside I matted and layered using black card and blue and white spotty paper from my stash. The next layer is yet again is another thing that I have never used before. In my stash I had an A4 sheet of white vellum, that was foiled with silver foiled swirls. The swirls reminded me of waves, so I layered in on top of the blue spotty paper, I used collall 3D glue gel to attached it to the paper. So the glue didn't show, I placed the glue gel in the center of the vellum, because I knew my topper would hide it. I cut out the largest and second largest shapes from Spellbinders decorative labels 22, in black card and green mirri card, I attached them to the vellum using cosmic shimmer. I used 3D glue gel to attach the mermaid to the matted and layered decorative labels 22. For the two front panels I matted and layered it with the green mirri board and the blue spotty paper. I then chose a die cut sentiment from my stash and coloured it with weathered wood distress ink from
Tim Holtz, so it would tie in with the rest of the design. I matted and layered the blue spotty paper onto black card. I attached the sentiment onto the matted card with 3D glue gel and attached it the the front of the card with double sides tape. I then used blue dew drop embellishments from DoCrafts, in different sizes to represent bubbles on both of the front panels and inside the card to represent air bubbles coming from the mermaid.

There we have it, my take on a gatefold card. I hope you enjoy it.

Ian xx

I would like to enter this project into {pin}spirational challenge Challenge #60

Monday, 3 June 2013

All Craft Challenge Blog Hop

 Welcome Blogland to the Craft my life blog hop for the re launch of Sparkling black roses blog challenge. The challenge theme was anything but a card. You've found my part of the hop, by visiting the lovely Tania, and enjoyed Tania's brilliant creation. Now it's my turn. This is my first ever time being involved in a blog hop and I am really excited, to be apart of Elaine's re launch and I love the theme, because I have just ventured into altered art and having another chance to create something using the fabulous product of Sarah Hurley, made my creative juices flow. So onto my project.

I have had a set of nesting boxes in my stash for awhile, so I decided to alter the largest box, but what could I turn it into. One of my favourite kits from Sarah is the the Expedition kit. As with all of Sarah's kit it is packed full with hand drawn papers and embellishments. In fact the kit gives you 12 12x12 resizable papers, 88 hand drawn embellishments, 2 x printable embellishment sheets and an alphabet. Some of the hand drawn  images are of vintage modes of transport. From vintage hot air balloons to tallships. So I decided to create a keepsake box for holiday memorabilia.

I used CraftArtist to print out a selection of the lovely papers and embellishment. I couldn't decide on which of the papers to use to cover the box, so I decided to use torn pieces of all the papers in a collage. I used A'color Allround Medium to glue the piece onto the box and seal them, with a gloss finish. Now the fun part embellishing the box, I printed out two more papers from the kit and used bitty blossom dies, from Spellbinders to cut the flowers and leaves. I also used a set of spellbinder flourish dies to cut the flourishes from the same papers. I fussy cut all the embellishments out, some of them words. I chose to use the binocular embellishments and the words See and Do to decorate the lid. I glazed the lenses of the binocular, with a 3D glaze. I then used the embellishments both images and words to embellish the sides of the box. I then used some self adhesive material to line it.

There we have it my Anything but a card project, My travel memory keeper.

Thanks you for visiting me on this part of the blog hop. I hope you like my interpretation of the challenge theme. The next stop on the blog hop is the lovely Lydia and you can hop over here . Again thank you for stopping by, and enjoy the rest of the hop.

Ian xx


Friday, 31 May 2013

All that Glitters is Gold


Hello Blogland it's that time of the month when the lovely Sarah Hurley launches her new blog challenge. Challenged 81's theme is All that glitters is gold. So you can go all out with your goldness or just hints, it's entirely up to you. So pop over and have a look at the rest of the design teams interpretation of the theme, that was chosen by the lovely Candice, here. So OK here my interpretation of the theme.

I was sent some book templates from my very good friend Wendy, and as soon as I saw them, I knew what kit would go well with them. Bookworm is the latest in a very large range of hand drawn digi kits, from the very talented Sarah Hurley. The kit is packed with 12 12x12 papers, 40 embellishments and just for good measure Sarah has included 5 hand drawn digi stamps, so packed to the rafters with crafting goodness. For more details of Sarah's Bookworm kit please click here. All of Sarah's kits can be easily added to any platform of Serif CraftArtist, please see my tutorial post for a step by step guide.


 I drew round the templates onto card and cut them out. I did the same with the book shelf paper, embossed mirri board and the ledger paper. I adhered the book shelf paper onto the largest page and went round with some yellow and gold chain link peel offs from my stash. I did the same with the ledger paper. I used red liner tape down the spine of the underside of the small page to adhere it to the embossed mirri board page and then I used a gold sequined ribbon down the middle to look like a bookmark. I attached the larger page to the other two pages the same way. I cut some flourishes out of two different shades of gold using Spellbinders dies and used them to embellish the bottom left and top right corners. I chose the book stack embellishment from the kit, I used CraftArtist professional 2 to resize and flip the embellishment. I also used CraftArtist to resize the Sitting boy and girl and the bookworm embellishments. I then printed them out and fussy cut them out. I decided to have the boy and girl sitting on the book stacks, so I used pva glue to stick the book stack embellishments flat and 3D glue gel to adhere the boy and girl embellishments. I used 3D gel again to adhere the bookworm. I used CraftArtist again to create the sentiment, cut it out and used 3D foam pads to raise it up. There we have it, my take on the challenge theme "All that Glitters is Gold." I hope you enjoy it.

Ian xx

The Bookworm kit and all of Sarah's fabulous products can be found here.

Wednesday, 29 May 2013

Easel Does it

Good Afternoon Blogland. This post is about my first Altered Art project. I really enjoyed making it so here goes.

The easel started it's life as a plain wooden easel that I purchased from That Craft Place Facebook group. I got it to display my creations, but I thought I would try altering it.

I first painted it with a coat of white Gesso, again from That Craft Place and put aside to dry. When it was dry I painted an acrylic wash in green and while it was still wet went over it with an acrylic wash in balck and left to dry. I then used Cosmic Shimmer metallic Gilding wax, the colour was golden light, to add some bling to the edges of the easel. I then used a stamp from IndigoBlu's Itsy Bitsy Background set and black dye based ink to add a bit of texture, I really should've used a stazon or an archival, but it dried eventually. Now comes the decorating. My friend and fellow member of Sarah Hurleys DT, Claire Newcombe, sent me some card candy and a few die cut bits, for being her 100th follower of her blog. To check out Claire's crafty creations Click Here. I made up the die cut flowers and and arranged them on my easel so I could see how it would look, when I was happy I glued them down. There we have it my first Altered Art project. I hope you all enjoy it.

Ian xx

I have entered my easel into the Crafting musketeers challenge #1 anything goes.